

The basic piping set available from Daiso – image by Jen Curcio
Baking is something that I take in stages. Like anything in the kitchen, once I feel like I’ve got the hang of a specific type of recipe, I graduate myself to the next stage. Currently, that is learning the basics of how to pipe for cupcake frosting, and maybe even filling baked goods.
But where do you start? Brands, disposable or reusable piping bags, and which nozzles are the best? All my online research returned a host of patchy results. Also being in Thailand and not speaking Thai makes conversations with cookery store sales assistants challenging.
I decided to take matters into my own hands and recruited some trusted home bakers to answer my questions and hopefully yours too. Thank you Alisia and Amelia (both DC contributors) and our special guest, the very talented Erin Pracy of Erin Made This – her pictures and recipes are divine!
This quick guide on how to buy your first piping bag set is divided into sections. Piping bag sets, bags and nozzles are all covered, as well as some tips and resources.
If you have any tips, thoughts or resources on piping you’d like to share, I’d love to hear from you!
JC x
SETS
What should one look for in a beginner’s piping set?
Amelia: It depends what type of piping you are doing – royal icing, buttercream frosting or both. I tend to buy bags and nozzles or tips separately. A couple of different nozzles are enough to do basic designs.
Erin: If you’re starting out or you are just doing it for fun a set is great. You want a range of tips – star and round and a range of sizes. I don’t often see a set with a good range though.
Alisia: The basics – a few piping bags; half a dozen different tips to practice with (say 4 standard and 2 specialty tips) and a couple to attach the tips to the bags. Anything that comes with a small guide or booklet is useful too.
Is it better to buy the nozzles and bags in a set or separately?
Amelia: I tend to buy bags and nozzles separately.
Erin: Definitely separately! Like I said, I don’t see sets that have a good range of tips. If you buy the tips separately you can get a good range.
Alisia: I have always bought nozzles and bags separately as I need them. I have looked at sets in stores and online and there are some fantastic comprehensive sets available. I do have a very old Tala icing set that used to belong to my mum, complete with the stainless steel syringe in place of the bag. So retro but still useful, depending on what you’re trying to do.
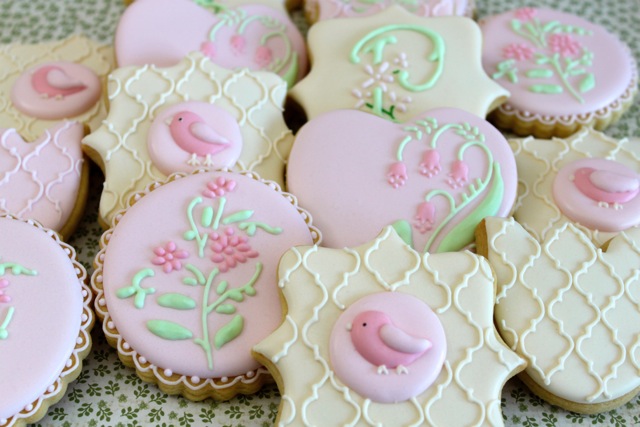
Some piping work by Julie Day of Miss Biscuit who has just opened her own bricks & mortar store – image by Julie Day
Are there any piping set brands you recommend?
Amelia: Wilton has a great range of piping bags and stainless steel nozzles, which are easy to find at cake stores and online. You can get selected Wilton products at Matchbox, Minimax, Big W and Spotlight.
I buy Loyal plastic nozzles and tend to buy nozzles and bags separately. Julia Day is a Melbourne baker who runs a business called Miss Biscuit. She specialises in royal icing biscuits and her work is fantastic. I have done a couple of her classes to learn the basics. They are very popular but well worth it if you can get a spot. Julia also runs an online store on her website www.missbiscuit.com.au, as well as her own store.
In terms of bricks and mortar shops, Cake Deco in the Port Phillip Arcade has a great range as does Bake Boss in Glen Iris. There is also a place called West’s Cake Decorations in Burwood and Chef’s Hat in South Melbourne. In terms of online stores, Miss Biscuit, Bake Boss, Biskart, Baking Pleasures are great along with various Easy stores.
Erin: No, sorry!
Alisia: Wilton has a number of different kits from 12 pieces to their Ultimate Decorating Set, which has over 100 pieces. There are a couple of plastic squeeze tube sets on the market, like Davis & Waddle’s and then a range of nozzle sets from Sweetly Does It, Baker’s Secret, Avanti etc. They are all reasonably priced at around $20-30 and include 15-20 pieces each. They all include stainless steel nozzles. I would personally go with one of these.
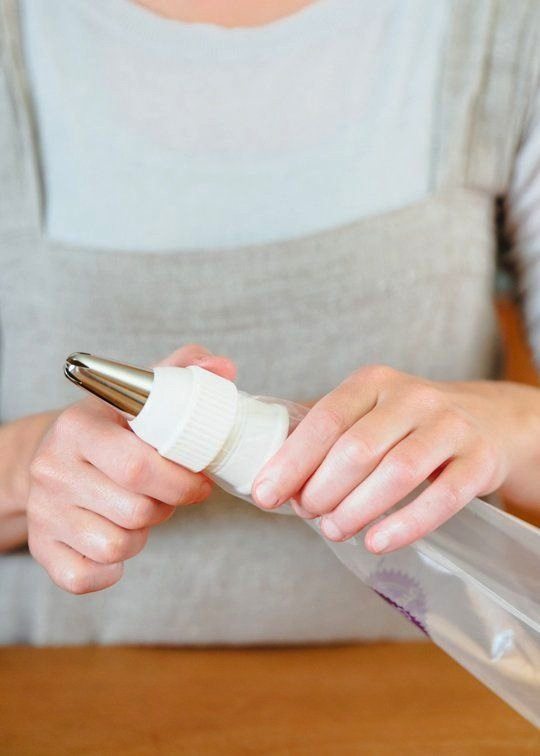
Image credit – The Kitchn
PIPING BAGS
Would you recommend buying reusable or disposable piping bags, and why?
Amelia: Traditionally I used reusable piping bags but have become a convert to disposable piping bags. You can buy them at speciality stores like the Essential Ingredient. Variety store, Daiso sells a packet of 10 for $2.80. I tend to buy them and they’re easy to use and clean plus you don’t have to worry about using the same piping bag for sweet and savoury. If I am doing royal icing I tend to wrap it in glad wrap and then feed that into the disposable piping bags. You can wash and reuse disposable piping bags very easily and even throw them in the dishwasher. I tend to use them two or three times and bin them but I know of people who use them until they are falling apart.
Regardless of what type of piping bag you use, I like a medium to large-sized bag. I find the small bags that you buy in some piping sets too small. You barely fill the bag up with frosting and then you’ve got to re-fill it. Plus I find I tend to squeeze a lot more than I do with a slightly larger bag.
If you want to do Miss Biscuit-style cookies where you use the outlining and then flooding technique you also need concertina squeeze bottles which you can find at variety stores like Spotlight, Big W and some supermarkets.
Erin: I think disposable bags have a place for sure. If you’re doing large quantities of things or a range of different flavours they are awesome. I prefer using reusable only to limit wastage and they’re better to store in the fridge if needed.
Alisia: I have always bought disposable piping bags. A good friend of mine is a pastry chef and she recommends disposable bags, so if they’re good enough for her, they’re good enough for me. I find that reusable are fine for a short time but do become stained and tatty after a while, forcing you to replace them anyway.
I have often bought disposable bags in bulk at the Chef’s Hat in South Melbourne, i.e. boxes of 200. Smaller packets of 20-50 are available in specialty cake decorating stores and other homewares stores like The Works in Hawthorn, Wheel & Barrow, House etc. Daiso also have some at $2.80 a packet, which is great value. On the odd occasion, I have just used a freezer bag or a snap lock bag. It does the trick when you’re desperate (during a midnight baking session, for example!).
You could always try making some from parchment paper, of course. YouTube has some great tutorials available. I have tried a few times with varying success. I think it depends on what you intend on piping with it.
What material is best for piping bags and which brands would you suggest?
Amelia: I find plastic is easier than stiffer material ones, particularly if you buy a reusable piping bag or if you are just starting out. In my experience, plastic bags are easier to use and easier to clean. I find sometimes things get stuck in the seam of stiffer bags. I tend to chop and change from sweet to savoury and if I’m using a material bag I worry I will get sausage roll residue in the buttercream!
Erin: I’ve only ever used Thermo Hauser bags which are cotton with a plastic coating. They are the business.
Alisia: Food grade plastic is fine. The bags I buy at Chef’s Hat are not branded in any way (or at least not that I can find on the box). I would imagine that any plastic food grade product meets Australian standards and is safe to use for this purpose.
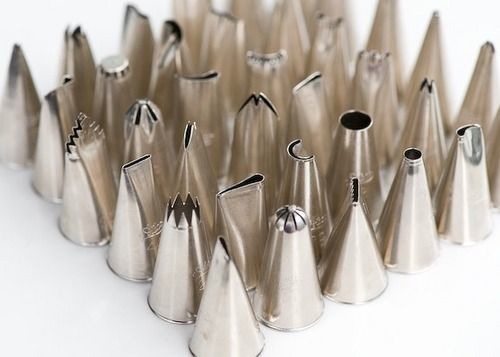
Image credit – Serious Eats
NOZZLES
Which nozzles are ideal for a beginner?
Amelia: I tend to use round or star tipped nozzles but you can also buy nozzles that do specific detail and shapes like leaves.
Plastic nozzles are easy in that you don’t need anything other than a few nozzles and a bag to start piping. My plastic nozzles are a brand called Loyal. I’ve bought them individually at the Essential Ingredient, Cake Deco, Bake Boss and Chef’s Hat over the year. I find plastic nozzles are great when you are doing thicker pipping (e.g. anything bigger than about .5cm). It is much harder to find very thin plastic nozzles. I find stainless steel nozzles are great for any royal icing cookies where you do the outlining and flooding technique or anything which is quite detailed. For beginners, a Loyal 1, 3, 9 and 15 or 17 would give you three or four round nozzles to start you off. They tend to cost about $2 each.
I’ve used Wilton 1, 2, 3 and 4 for basic royal icing piping. Wilton tips tend to cost about $4 each. Couplers tend to cost $2 to $3 each. Both Loyal plastic nozzles and Wilton stainless steel nozzles have a number inside indicating how wide or narrow the tip is. The smaller the number the thinner the tip.
Erin: I think it depends on what you want to achieve. Larger nozzles will give you better control when you’re starting out!
Alisia: The most common nozzles are round and star tips. There are two types of star tips – open and closed – which produce quite different results. All these tips are incredibly versatile and can create a variety of interesting effects, providing you know how to use them. I would start off with these as a beginner and master what can be achieved with them before moving on to more complicated things. There are some great resources online that demonstrate how this can be done:
http://www.make-fabulous-
http://www.cakecentral.com/
YouTube complements these static visuals. It’s one thing to see an image of what a particular nozzle can create, however it’s much more useful to watch someone do it and try to replicate their movements. Searching “cake decorating piping” or “piping nozzle guide” into Pinterest also brings up a plethora of useful charts and guides showing the effects that can be achieved. I have a couple printed in my baking folder at home that I refer to when I need them.
Is there a difference in using plastic versus stainless steel nozzles?
Amelia: Stainless steel nozzles are much smaller and traditionally need to be used with a coupler – a plastic ring that looks like a two piece washer. One large piece of the coupler goes inside the piping bag. You then fill the bag with icing and put the nozzle on the outside of the bag and secure with the washer-like ring from the coupler. The beauty of using a coupler is you can change nozzles very easily without having to up end the piping bag, take the icing out, change the nozzle and then fill the bag again.
Stainless steel nozzles and couplers are great if you want to do work with lots of different colours as you can easily switch nozzles among different bags. Both can go in the dishwasher.
Erin: I don’t think so, no. The finer piping tips seem to only come in stainless steel. They will definitely give you a finer result.
Alisia: I use a combination of both and haven’t experienced any difference between the two with regard to the quality of the final product. Providing you look after them properly – wash and dry them thoroughly after each use, they should last a long time.

Nozzle shapes – image by Glorious Treats who have some great how-to’s
Do you have a favourite nozzle shape?
Amelia: It depends what kind of piping you’re doing. The Wilton 1-4 tips are great for basic royal icing piping on cookies. If I’m doing cupcakes the leaf tip #66 is great for a soft serve-style finish.
Erin: I love large round tips and tend to stay away from the star nozzles.
Alisia: For the type of piping I do, I tend to use the round nozzles the most, however there’s something nostalgic about the star nozzles and the effects that they create. They take me back to my childhood and memories of Women’s Weekly Birthday Cake book cakes.
TIPS
Do you have any tips to impart for fellow pipers?
Amelia: Piping can be really time consuming and takes practice. Don’t get frustrated if your work doesn’t look just like the picture. If I’m piping with buttercream and don’t like the finish, I simply scrap the frosting off with a palate knife or dog legged spatula, put it back in the piping bag and redo.
Miss Biscuit and Sweet Ambs are great for royal icing cookie inspiration. They regularly post photos and occasionally videos on their Facebook and Instagram pages.
I always use the vanilla buttercream frosting recipe from the now defunct Crabapple Bakery. It is quite a large quantity and can easily be halved. See below under RECIPE.
Erin: Practice! Also, focus on applying and releasing pressure. I also find YouTube videos the best to learn from!
Alisia: There are so many elements to good piping – knowing what to use, having a steady hand, the right consistency of the piping fluid and so on. Like every craft, practice makes perfect. Soak up as much knowledge, expertise and experience as you can. Attend classes if and where you can. Books are a great resource and I recommend seeing what’s available at your local library. And of course, as I’ve already mentioned, the internet. Here are a couple more sites that I have referred to from time to time:
http://www.howcast.com/guides/
http://www.wilton.com/
http://www.birthdayexpress.
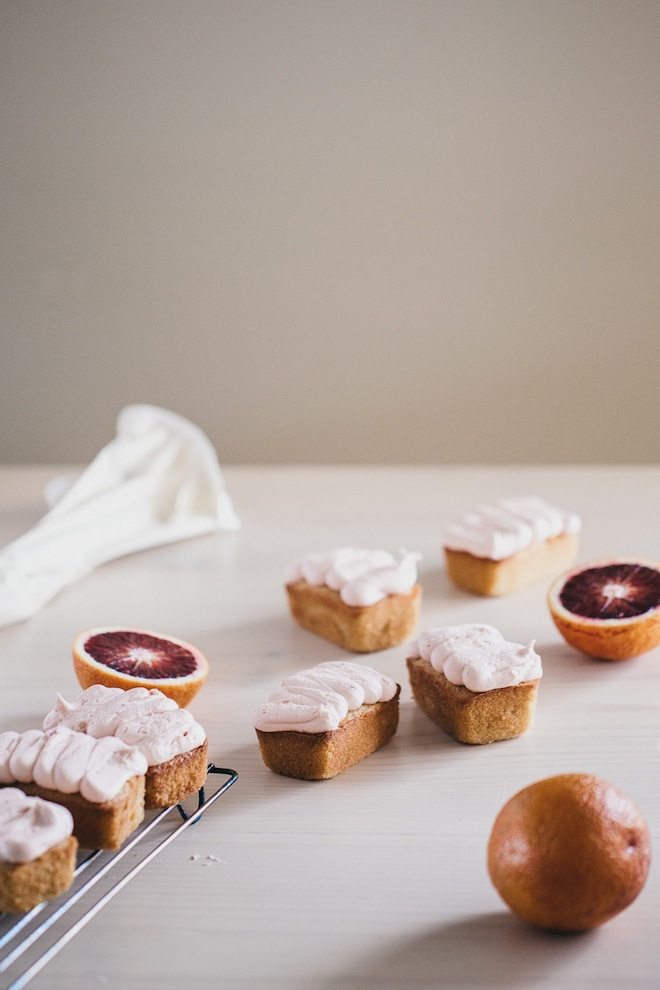
Blood Orange Mini Loaf Cakes by Erin Pracy of Erin Made This – image by Erin Pracy
RECIPES
The girls have kindly shared a couple of recipes to get you practicing your piping skills.
Erin has suggested her Blood Orange Mini Loaf Cakes (see drool worthy image above), which you can check out at her website here. Amelia has provided her basic butter frosting recipe – see below.
Butter Frosting
by Amelia Harris
200g unsalted butter, softened
1/2 milk
1 tablespoon vanilla extract
8 cups of icing sugar, well sifted
Cream the butter for 1-2 minutes in a stand mixer or with a hand held mixer.
Add the milk, vanilla extract and half of the sifted icing sugar and beat for at least 3 minutes or until light and fluffy.
Add the remaining icing sugar and beat for a further 3 minutes or until the mixture is light and fluffy and a spreadable consistency.
Add extra milk if the mixture is too dry or extra icing sugar if it is too wet.
Colour or flavour the icing as desired. Add colouring / flavour a drop at a time and beat until you reach the required colour and or flavour.